[This is a guest post from Craig Smith at Lifein12Keys.com on how to write the perfect blog post in 8 simple steps! Writing the perfect blog post becomes much easier with these awesome tips. Craig also provides a blog post writing checklist to help you stand out and get the most out of each blog post you write!]
Hey, my first Guest Post! I’m honored that Amira would have me as a Guest writer on her wonderful Blog. If you’re reading this, I bet you feel the same way.
I met Amira about 2 months ago when I first started Blogging in her Facebook Group – A Self Guru – Biz Blog Community. It quickly became my “Home Base” group and is still my favorite.
I wrote a bit about Amira and the group in my interview with her on my website:
Related Article: Creating Legal Pages for Your Website.
Table of Contents
The Perfect Blog Post
Today I’ve chosen The Perfect Blog Post as my topic. After a few months of engaging with the wonderful Bloggers in our Facebook Group, I’ve found that there is a real need out there for just the basics.
I’m going to take everything I (we) do in a blog post and break it down into about 8 Steps. I’ve done my best to address all of the questions I get asked the most by my friends in the group, as well as other Bloggers I meet out in “real life”.
Let’s get started!
Outline Your Blog Post
Step #1 The Outline
A great way to start any writing project is with an outline. I don’t know about you, but I remember learning outlines in about the 6th grade. It is a skill that I have used my entire life with all types of writing projects from simple grocery lists to 5000 word tutorials.
Throughout this article, I’m going to use this very post as my example for everything. Let’s take my topic idea and make it into a simple list:
- Outline Your Blog Post
- Content
- Writing
- Keywords and Headings
- Formatting & Length
- Affiliate Links
- Graphics and Images
- Promotion
Simple enough, right? Now take your list and add a few sub-topics to each one. As a Musician, I’ve always favored the Harvard Style Outline but feel free to do it any way you like.
I. Outline Your Blog Post
a. How to write an outline.
II. Content
a. Your niche.
b. Evergreen or Seasonal.
III. On Writing
a. Grammar and punctuation.
b. Length of a post.
IV. Keywords and Headings
a. How to use H1, H2, H3 tags.
b. Optimizing Keywords in your post.
c. Formatting.
d. Using images and theme shortcodes.
V. Affiliate Links
a. How to insert Affiliate Links.
b. Amazon & Share-A-Sale.
VI. Graphics and Images
a. Using Adobe Spark Post to Create images.
b. Image Formatting
c. Featured and Pinterest
VII. Promoting
a. Facebook Groups & Pinterest.
VIII. Backing Up & Email Grab
Ok! Now we have a great outline of our new Perfect Blog Post. Sure, it looks long, but it really only takes a few minutes to lay that out. Now we just need to fill it in with great content.
Blog Post Content
Step #2 Content Matters
If you’re a 1 niche Blogger, you probably have a specific idea of what content you’re working on for any given day or week. If you’re like me, a multiple niche Blogger, it can be a bit more difficult. I’m more of a fly by the seat of my pants type of guy, but really whatever works for you is fine as long as you’re regularly producing good content.
Evergreen or Seasonal
Evergreen content is content you can use all year long, forever! This is the content that sits on your website for months and years and hopefully creates you a nice passive monthly income.
For someone like Amira, that might be content pertaining to her website Legal Pages Bundle.
For me, it might be a Guitar Lesson Ebook or recipe article. Anything you can use and promote throughout the year is evergreen content.
Seasonal content as you probably guessed, is specific to Holidays or certain timed seasons throughout the year. For example, we just passed Halloween. If you had any good Halloween posts or pins you’re probably not going to see much traffic or activity with those for another year.
As Thanksgiving, Black Friday (Cyber Monday) and Christmas approach, you may want to consider creating some specific Seasonal content for the next few months. Of course next year you’ll have a great head start as you can promote those articles all over again!
On Writing
Step #3 Writing Content
Writing can be difficult for some people. It’s the #1 problem I see in Facebook groups.
- What do I write about?
- I’m stuck on an article.
- I’ve been staring at my screen for hours.
- I haven’t posted anything in 2 months.
Hey, don’t overthink it. ANYONE can write engaging, thoughtful content….. and you don’t have to be an English Major or literary genius to pump out great articles and content.
I barely graduated high school with a low B average and never set foot in a College in my entire life. That stuff just doesn’t matter. Be yourself!
Are you a new blogger wondering what to write about? Ask yourself these 5 questions:
- What do I love the most?
- What am I passionate about?
- What am I an expert at?
- What do my readers need or want?
- What can I share that could be of value to a complete stranger?
Never for a second think that your niche or field of expertise won’t do well. Any niche can do well…and any topic. I read an article recently about a blog teaching people how to plant herbs that earns $20,000 per month. $20k teaching people about Herbs! Yowsa!
Grammar and Punctuation
If you’re like me and don’t have a Masters Degree in English Lit, you may worry about your spelling and Punctuation. Don’t.
English as a language is much more flexible than people think. Sure spelling is more or less non-negotiable, but grammar and punctuation should be best left to the writer, within reason.
Write in Your Own Voice
Again, within reason… but the best articles and Blog Posts are the ones where your reader gets a feel for your personality and character. If you try to come across too serious or business-like, you’ll probably turn people off.
I highly recommend Stephen King’s book “On Writing”. Growing up in the 80’s, Stephen King has long been one of my favorite Authors. When he wrote a non-fiction book about the craft of writing, I was floored.
His insights into punctuation, use of commas and periods to emphasize points like…… this for example….has been an invaluable source for me as a writer.
Opinions may differ on this subject….but I’m with Steve on this one. Creative punctuation, even contrary to the things you’ve learned, can go a long way to making your blog posts more engaging to a wider audience.
Keywords and Headings for Blog Posts
Step # 4
There is certainly no shortage of SEO (Search Engine Optimization) experts on the internet sharing or selling information on the best ways to get your stuff found in search engines.
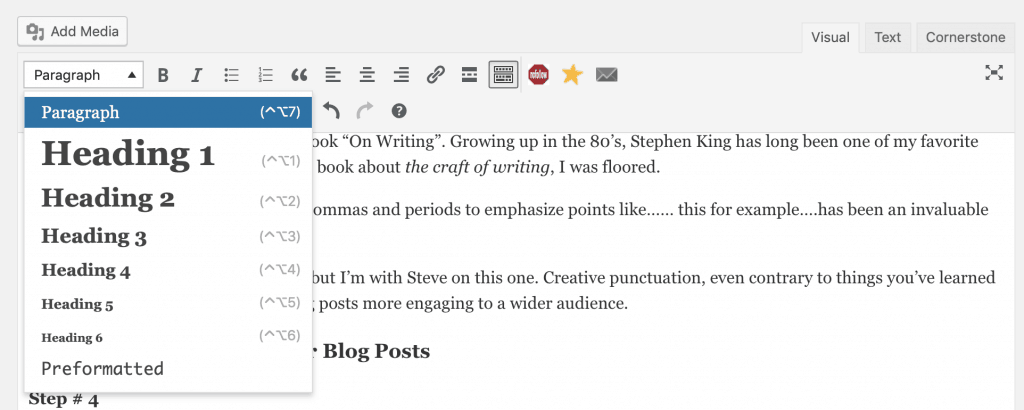
One thing they all agree on is the use of Keywords and Headings Tags. When you’re in the WordPress editor you’ll see a drop-down menu at the top left that lets you highlight text and format it into different styles.
Some general rules to follow:
- H1 Tags will be the default tag WordPress uses for your Blog title. It should never be used in your post body content.
- H2 tags, as you may have guessed, are #2 to be picked up by search engines. Save these for big headlines or subtitles. Limit use to once, maybe twice for really long articles.
- H3 tags are great for breaking up long content. Use these as section headings throughout your post.
- H4 tags are good for things you want to emphasize within a sub-heading. Like the example below:
Blog Keywords
Keywords could easily warrant a separate article. It’s a long and often misunderstood, over-complicated topic. Let’s talk about what we know for sure.
You should make sure keywords are prevalent throughout your blog content without seeming spammy or trying to trick a search engine. Google has penalized many websites for keyword spamming.
I like to include a good grouping of keywords in the title:
“Writing the Perfect Blog Post in 8 Steps” or “8 Steps to Writing the Perfect Blog Post”
We have “Writing”, “Blog” and a number (8) in there. People love numbers and lists. Anytime you can include one, you should.
Some of my most successful converting post titles include:
- 5 Books Every Guitarist Should Own
- The 7 Day Practice Routine for Guitarists
- Blogging: The First 30 Days – Tools, Tips & Tricks
You get the idea. For this article, I’ve also included important keywords in all of my H3 tags. For example, above I named the H3 tag “Keywords and Headings for Blog Posts” instead of just “Keywords and Headings”. I wanted my keywords “Blog Posts” in there, so I added them.
Formatting Blog Posts
Step #5
This one is fairly straightforward. When formatting a blog post, the most important thing to remember is to break up those paragraphs. You’re not writing a novel.
Don’t Do this: This is where you really have to throw your grammar and literature rules right out the window. A general guide to follow is never to use more than 2-3 sentences without a nice break. Using this paragraph as an example, I’m purposely making it too long. This makes reading your blog post too much like reading an actual book. While this may work in a real book, on a website it’s too hard to read and you will lose your audience. It is widely agreed upon by veteran professional bloggers that it is bad practice and should be avoided. It also looks horrible for mobile users. Imagine reading this on your phone (maybe you are?). So, break it up as I have throughout this article.
You can (and should) use images and shortcodes to break up your blog posts in any way that you find attractive. Most themes come with a list of shortcodes. If you’re not using them, the WordPress defaults can be effective too.
Here’s an example of an ET Box Shortcode from Amira’s WordPress theme.
You can use any of these options in your blog post:
- Blockquotes, Content Blocks, Tables, Italics, Use of Bold and highlighted texts, Numbered and bulleted lists, etc [/box]
All of these options can go a long way to making your blog post more attractive to the reader.
The Length of Your Blog Post
There are differing views on this one. Most of my favorite SEO experts agree that 2100-2500 words is the sweet spot. 1000 word or fewer posts get lost in a sea of mediocrity. This one is clocking in at just over 2500.
I’ve found from personal experience that my 2 best performing posts are 1800+ and 2600+ each. Just under and over seems to do well too. These are posts that as a new blogger, I’m getting 1000+ Pageviews per day. Not bad, right?
Longer is almost always better.
Affiliate Links
Step #6
Once your masterpiece is finished, formatted and looking sharp, it’s time to monetize! I wrote a fairly detailed tutorial on monetizing here: Monetize Your Blog in 6 Simple Steps.
If you’re completely new to monetizing, let’s cover a few essentials:
Affiliate Programs
I’ve found for beginners and brand new bloggers that Amazon and Share-A-Sale are the easiest to get approved and started right away. There are no traffic requirements and there are a wide variety of products and resources to share in your articles.
Share-A-Sale
Once you’ve created your account, simply log in and start looking for stuff you want to link to. If you are required to apply for a specific vendor, I’ve found a simple, friendly message works every time.
“Hello,
I’m Craig Smith from http://lifein12keys.com , a Music, Blogging and Lifestyle website.
I think your products would be a great fit for my readers. If you have any questions, feel free to contact me anytime.Thank You,
Craig Smith
[contact info]”
So far that little nugget has gotten me approved every single time. Maybe they’re not that discerning, but regardless it has worked for me.
Amazon Affiliates Program
I really like Amazon’s program. Everything is easy to use and well laid out in a way that is very easy to implement into your website. Amazon is converting well for me but there are a few downsides.
- You must make 3 qualified sales in the first 180 days.
- The cookie length is only 24 hours.
Last month I made a video for some friends in our Facebook Group that covers exactly how to put Amazon affiliate links and ads on your website:
Graphics For Your Blog Post
Step #7
After all of your text, formatting and affiliate links are in place, it’s time to get those graphics done. Most people either love or hate this step. I’m on the fence.. sometimes it’s a lot of fun depending on the topic. Sometimes it can be a real chore.
Luckily there are some great tools to make it easy for everyone.
Canva or Adobe Spark Post?
You’re going to see a lot of bloggers out there recommending Canva. I’ll admit, it is easy to use and works just fine. I prefer Adobe Spark Post for a few reasons:
- Adobe’s Photography package is only $9.99/month and includes Adobe Spark Post, Lightroom CC, Photoshop CC and 20 GB of Cloud storage.
I don’t know about you, but I couldn’t live without Photoshop. It’s worth the price alone. - Canva costs $12.95/month and doesn’t include any of that stuff.
- Adobe’s vibrant community of artists and illustrators ensures the best free image library available anywhere on the internet.
- Adobe has an affiliate program! Canva does not. Not only does Adobe Spark Post does everything that Canva does, I can also sell it. Yes please. 🙂
- Side note: PicMonkey is also another great option for creating graphics if you want to be different and want your graphics to stand out from the majority that uses Canva.
- Better yet: Grab these Pinterest templates and save yourself all the time and headache of designing your own graphics!
Featured Image & Pinterest Graphics
Depending on your blog’s layout, you’re going to want to make a Featured Image graphic. Typically these are in landscape format.
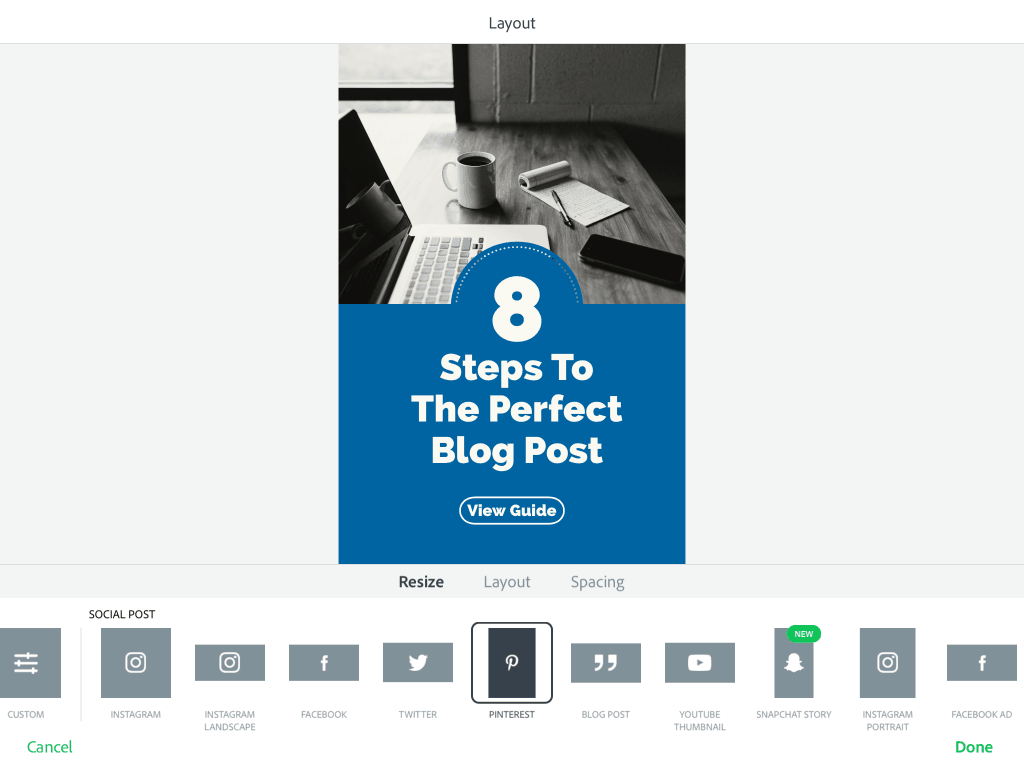
Luckily, Adobe Spark Post has a setting just for that size. Below is a screenshot from the iPad version of Adobe Spark Post:
You can search the free templates or make your own from scratch. For this example, I’ve created a colorful graphic from a template in Adobe Spark for my Featured image:
Pinterest Graphics
Pinterest should be the most important part of your marketing and promotion as a new Blogger.
These are the ones that really matter. Nobody will click away from your website if they don’t like a Featured Image, however, you have to get them to the website in the first place!
Art is subjective. What looks beautiful to you may look hideous to others. All you can do is try your best without wasting too much time on this step. Sure, graphics are important, but not as important as good content.
I like to make a few different graphics for each type. I always make 2 for Pinterest so I can swap them out later.
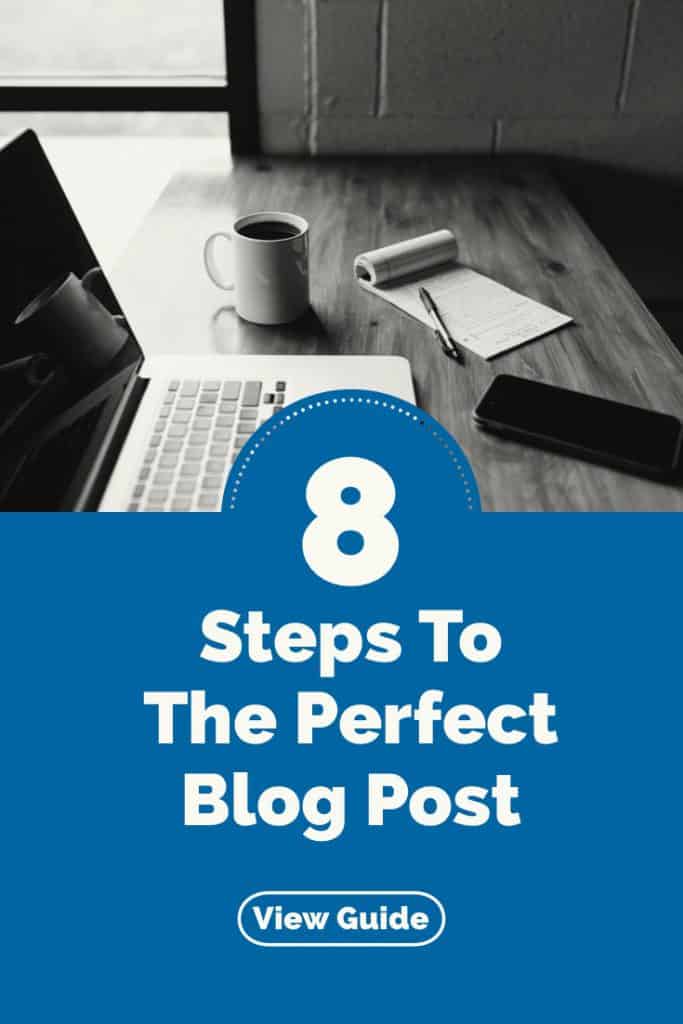
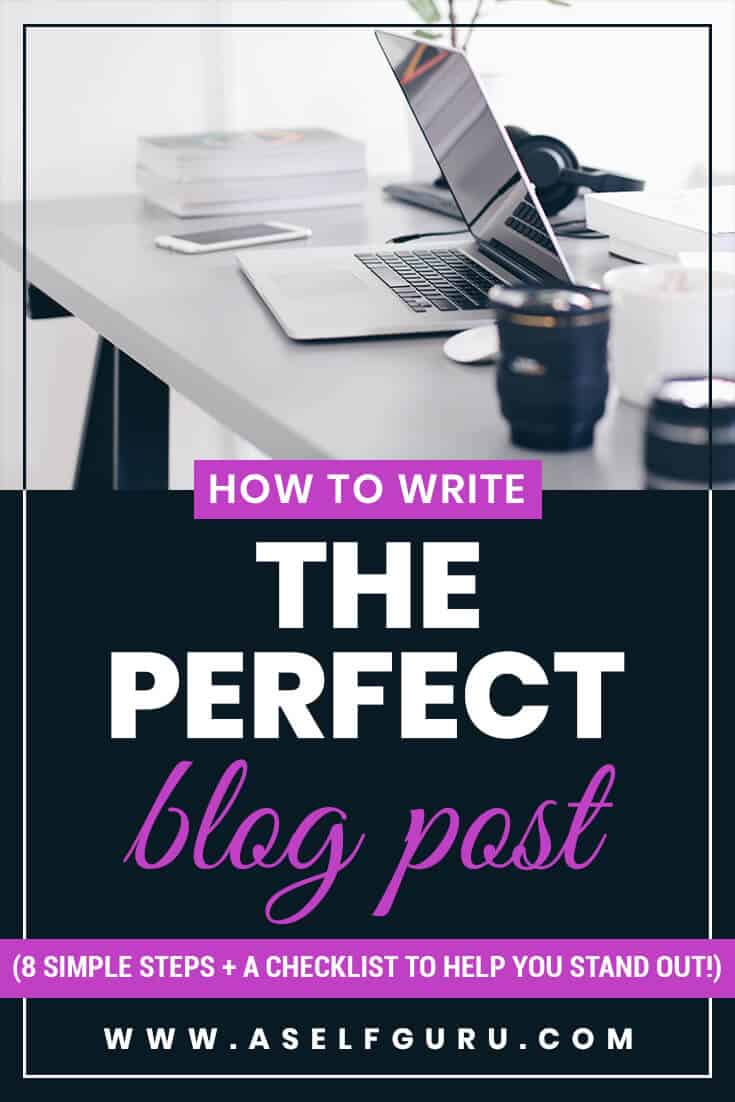
Here’s one example:
Some best practices to follow for Pinterest graphics:
- Vertical styles are a must. People will avoid sharing your horizontal or square graphics regardless of how nice they look.
- Pinterest standards are about 735 x 1102 pixels.
- Avoid using faces in graphics. It is well documented that any face on a graphic will convert poorly.
- Stick with a color palette. I went with blue and B&W for the first one and a more appealing (to Women?) pink palette for the second. Who is your audience? Women, Men…..both?
- Try different ideas and see what works. You might be surprised what you can create with a little effort!
More Pinterest Tips:
- Don’t worry about how many followers you have. It’s all about Monthly Viewers on Pinterest. You could have only 2 followers that share one pin that brings you 100,000 clicks to your articles.
- Pin often. 10-30 times per day is widely recommended.
- Use a scheduler like Tailwind.
- Don’t rely on Group Boards alone for traffic. In many cases, these can turn into a garbage dump for pins of varying topics. This can actually hurt your Pinterest SEO and thus reduce your monthly viewers.
Adding MetaData to All Images
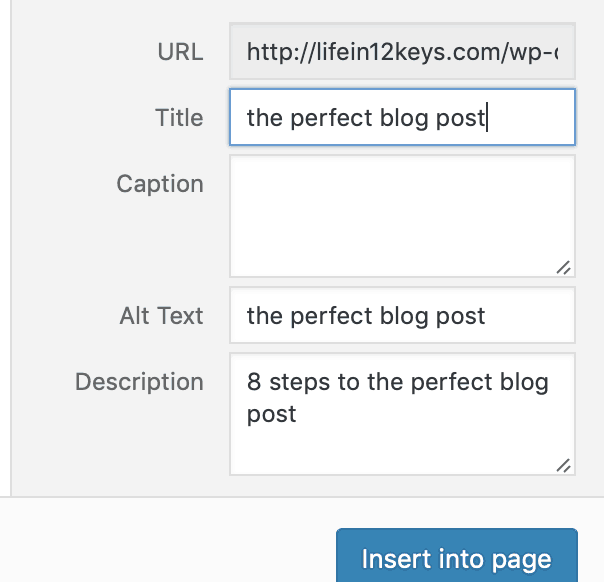
This is a simple yet very important step. Every single image you add to your media library needs some Metadata.
Just a simple phrase or sentence is all you need.
ALT Text is particularly important as it shows up on Pinterest as the article’s description. You can edit this directly in Pinterest but often it’s easier to just do it right in the image MetaData:
WordPress Backups
Step #8 Creating a WordPress Backup
I’m always amazed that nobody ever talks about this topic! It is so important. Always back up your work.
My basic philosophy on backing up:
I Always Backup WordPress:
- After posting a new article.
- Before doing ANY updates.
- Before installing ANY Plugins.
- Before switching themes.
- After doing any significant amount of work that could be lost.
I use the All-In-1-WP-Migration Plugin. (It’s free)
Click Export, Save as a File on your computer and you’re done! Importing a backup is just as easy. Just import the save file.
Email Grabs
Step #8.5
Ok, this is sort of a bonus step but SO important. Every serious Blogger must have an email list.
Somewhere within the body of your post (or usually at the end) make sure you have an email capture form setup to gain new email subscribers. “The Money is in The List”.
PIN FOR LATER:
About the Author:
Craig Smith is a Professional Guitarist, Writer and Blogger in Sanford, Florida. After teaching and performing for over 25 years he started www.Lifein12Keys.com as an online outlet for his writing passion.
An Educator at heart, Craig loves to teach people how to play Guitar and Blog.
When he’s not playing Guitar, Skateboarding or arguing with you about why Vinyl Records sound better than CDs, you may find him by the pool with his wife Celeste, 4 Chihuahuas and a drink.









Loved Craig’s post!
I sorely needed it!
I will be applying his tips for blog post I write and going back and making edits on past ones!
Thanks!!!!
That’s great to hear, Kevin! So glad the post helped you 🙂
Thanks Kevin. I’m so glad you found it helpful. Good luck buddy!
Really useful post. I fail to do most of the things on this list.
Thanks, Phill. Glad it helped you!
Hi Craig and Amira,
I love this post!!! So helpful. I am a newbie and there is so much to learn. I love when information is easy to follow with detailed steps. I really appreciated the video b/c I’m still confused about how to use Amazon affiliate and this helped immensely!
I’m definitely bookmarking this one to refer to often! 🙂
Awesome! We are so glad to hear that, DeShena. Craig did a great job breaking it down into simple 8 steps you can easily follow.
Thanks DeShena… I’ve always been afraid of making videos but people seem to like that one. I hope it helps. Feel free to reach out if you get stuck or need some guidance.
What a fantastic read Craig, I’ve been blogging for six months now & am constantly learning & found some of these points very helpful.
Glad to hear that, Michelle!
Thanks Michelle! I’m glad you liked it. 🙂
This is such an informative post. I struggle with writing and can never get it to flow for me. This will help, I’m sure.
You are welcome, Marissa. Yes, the post will help you because it breaks down the process step by step!
Loved this post by Craig. Such a useful post. I am sure to be referring to it often.
That’s awesome! Thanks, Bhavna and yes, Craig did such a great job with this post!
Heaps of great information. Very thorough. There’s always so much more to learn.
Yes, there is! Glad the post helped you 🙂
Wow, this a nice post. So detailed on everything you need to make a perfect post. Let me say is till have some of my past posts I need to edit
haha yes, edit the old posts to make them better! Glad you found the post so helpful.
Excellent tips! I often forget to back up my site, so I love this reminder! Pinning this too because it’s that great! 🙂
Thanks, Shirley!
Really useful information, thanks 🙂
You are welcome!
SO helpful. Thank you! I can’t wait to get home and apply some of these tips to my blog.
That’s awesome. Glad you found it so helpful!
Wow! This is so packed of no-fluff information! As I was reading, I thought to myself, “Is he really a newbie blogger?!” and then I read the part where it said “educator for 25 years”! Great post! Love reading it, Craig! Great collaboration you guys!
haha, I know, right! Craig did such a great job with this blog post. So glad it helped you 🙂
Wow! This is a super post! I learned a ton of new things that I hadn’t realized before. Thank you so much for sharing all of this!
Thanks, Sasha. Glad to hear that!
Hi, this question to the Craig and you Amira.
There is a recommendation in the post to pin very often: 10-30 times per day.
If you don’t have a lot of graphic content, do you repin the same pins?
No, you would want to create different pins for each post. Don’t pin the same one multiple times in a day because that would be spamming and you could get your account suspended by Pinterest. Here’s the easiest and fastest way to create pins: https://aselfguru.com/100-pinterest-templates-to-create-viral-pins-on-pinterest/ Hope this helps!
Hey AMIRA , Great post with effective tips for writing a perfect blog post. I really like your post and truly like the tips that you have included, whereas your all the suggested tips are effective for writing a perfect blog post. Outline is a great way to begin a writing. Content is a king and plays a vital role, whereas writing a perfect niche for blogs means a lot. Keywords and headings also plays an important role, hence using a correct and appropriate headings will also boost the ranking. Using attractive graphics and images also works well and engage… Read more »
Thanks you! I’m glad you enjoyed this post 🙂
Thanks, Aadrash for your detailed comment! I can tell someone really enjoyed this post 🙂